Email-to-Case In Salesforce
What is Email-to-Case?
Email-to-Case helps automate customer support by converting received emails from customers into cases and auto-populating fields for quick resolution. Email-to-Case on-demand service manages email traffic outside the network's firewall and limits messages to 25 MB.
Email-to-Case Key Features and Benefits
- Seamless association of customer responses with original cases, including attachments, streamlining case management.
- Comprehensive case reporting tracks both inbound and outbound emails, providing insights into issue resolution processes.
- Flexible routing addresses enable the creation of multiple email addresses for converting customer emails into case fields.
- Integration with Assignment Rules, Escalation Rules, Workflow Rules, and Auto-Response Rules ensures smooth operation and enhanced efficiency.
Setup Email to Case in Salesforce
Microsoft 365 Admin
Before anything we have to set a couple policies in Microsoft 365 Admin
- Open the Microsoft Admin
- In Admin Centers Tab, go to Security
- In Email & collaboration tab, go to Policies & rules
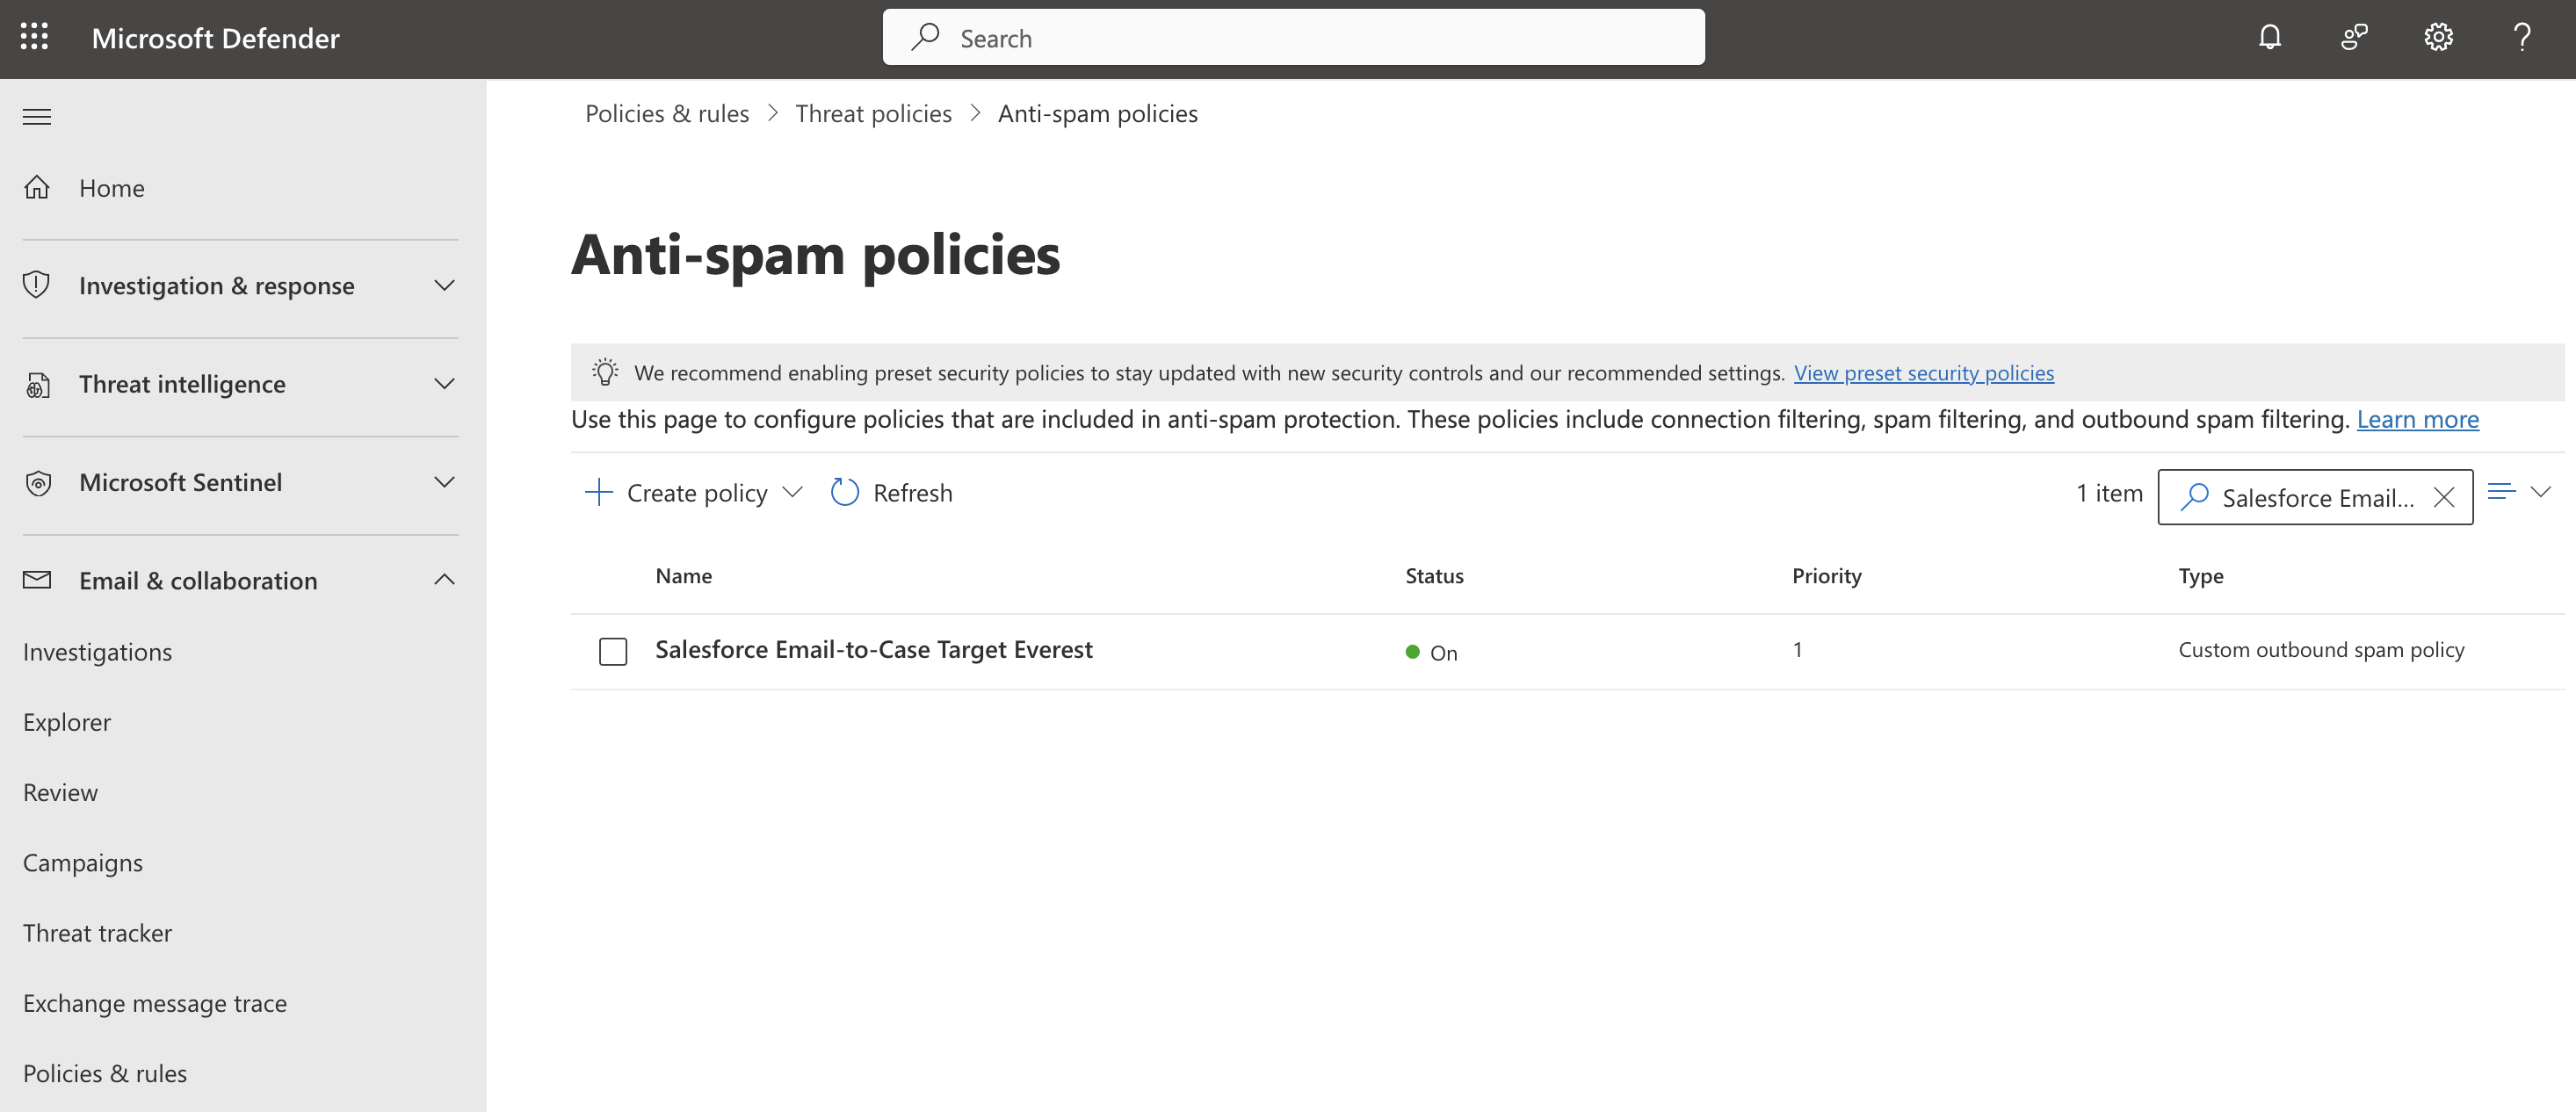
- In here click Create policy > Outbound
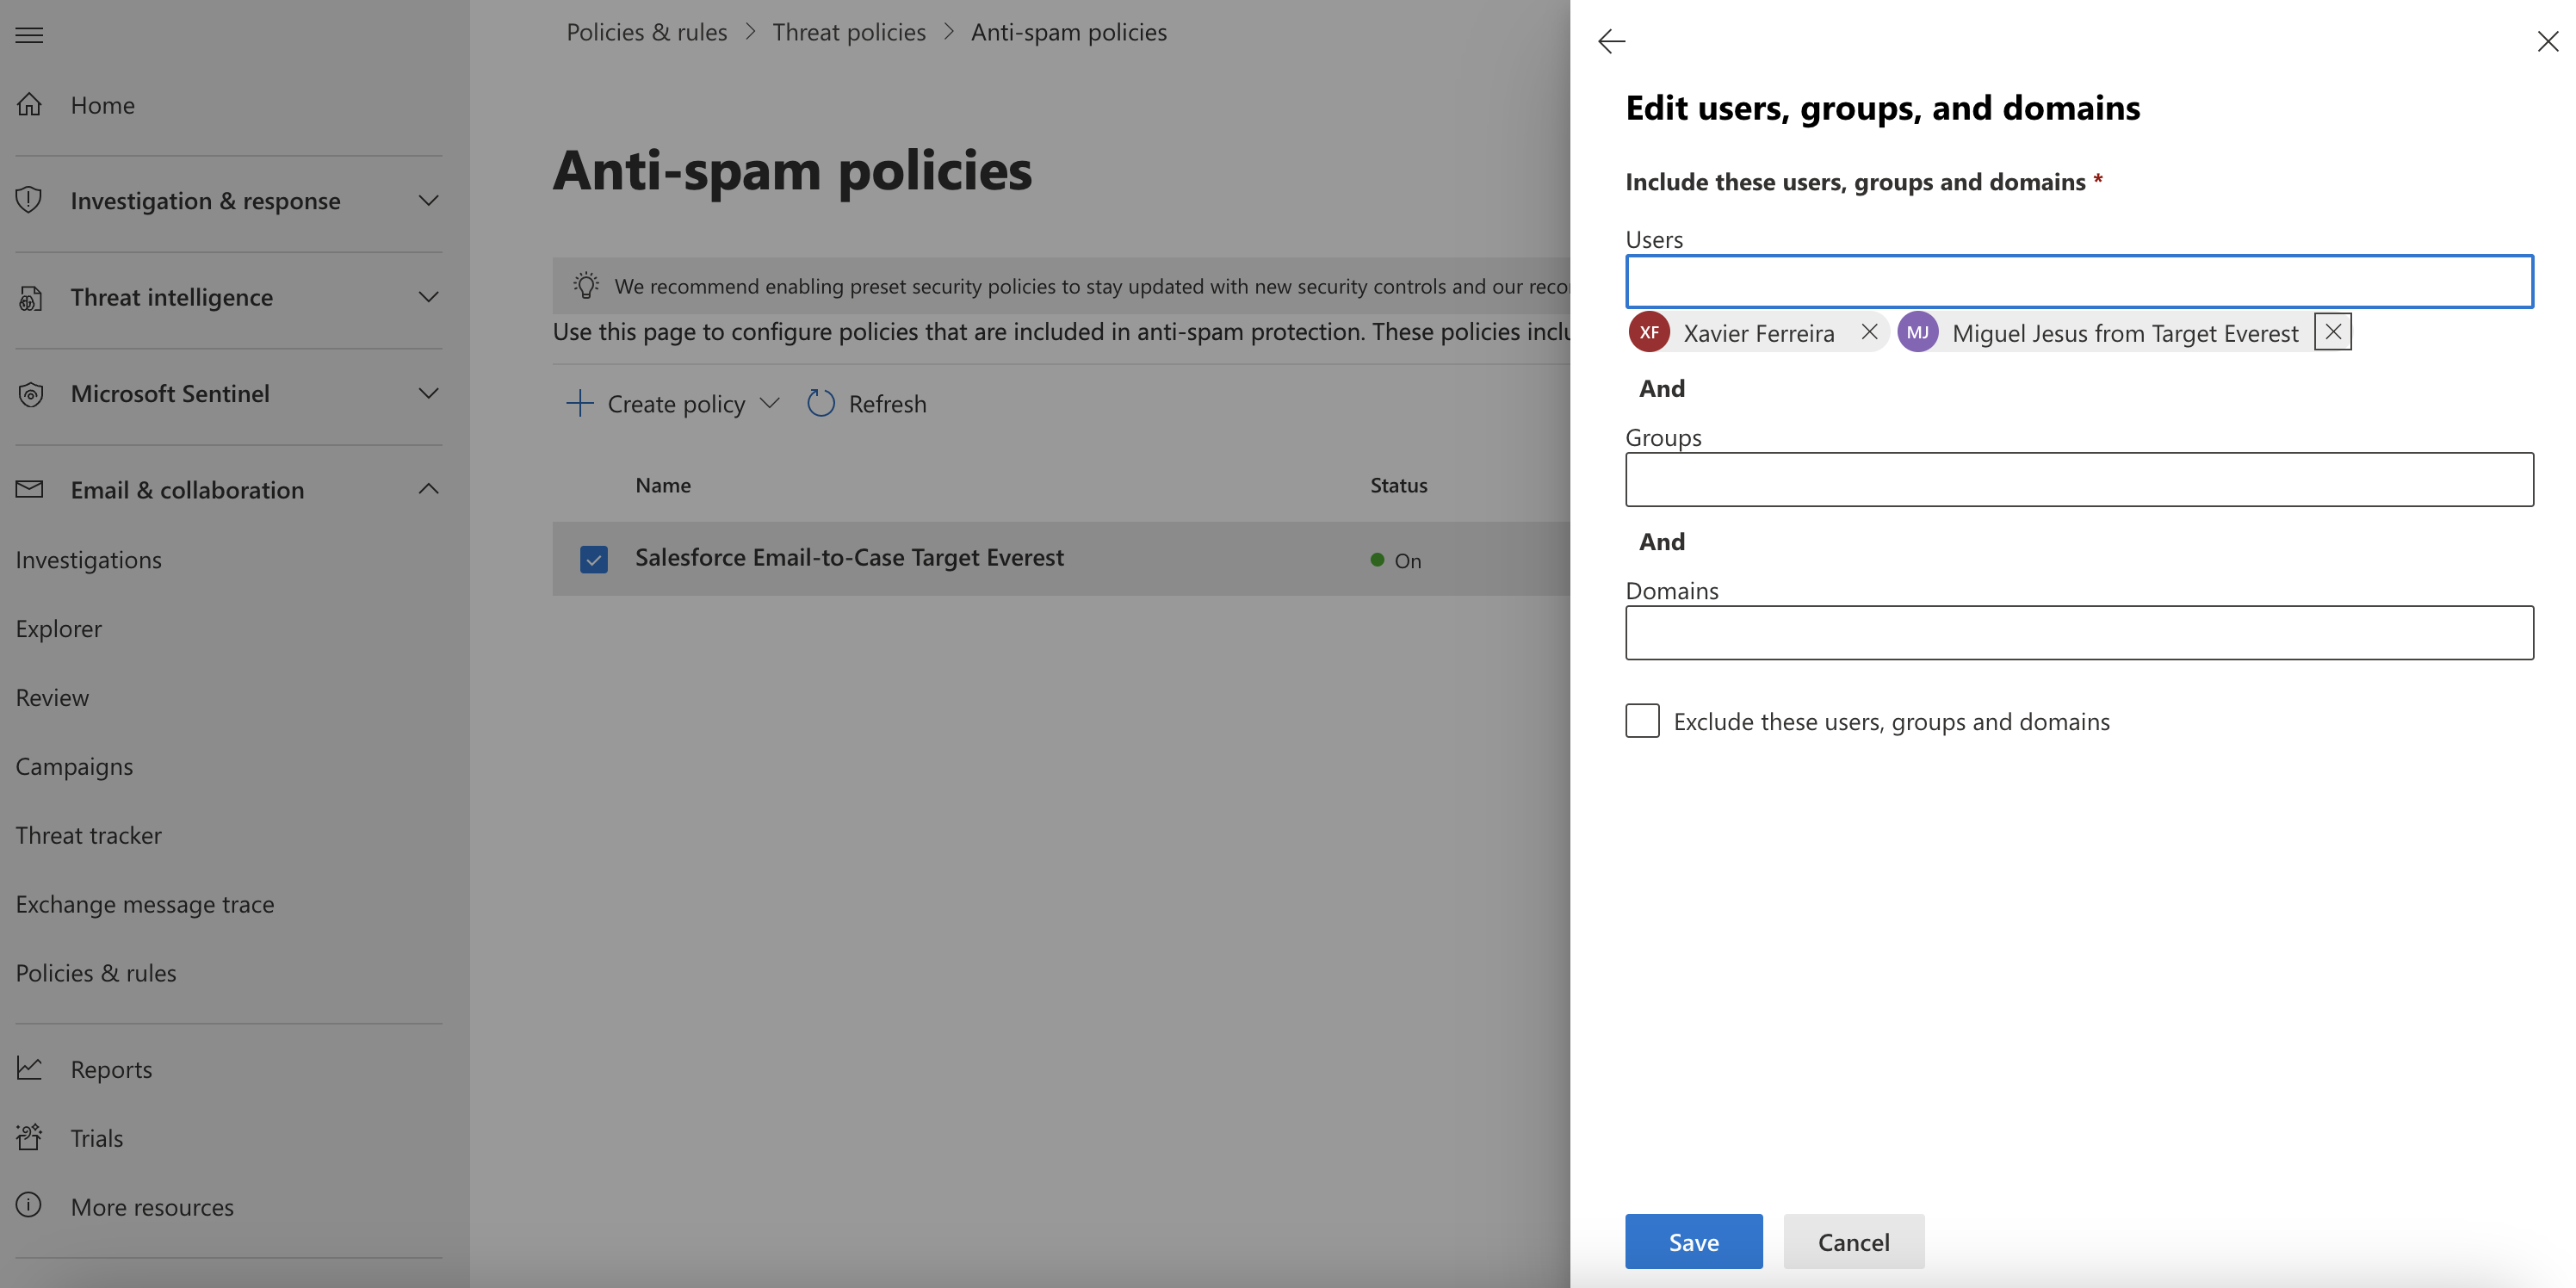
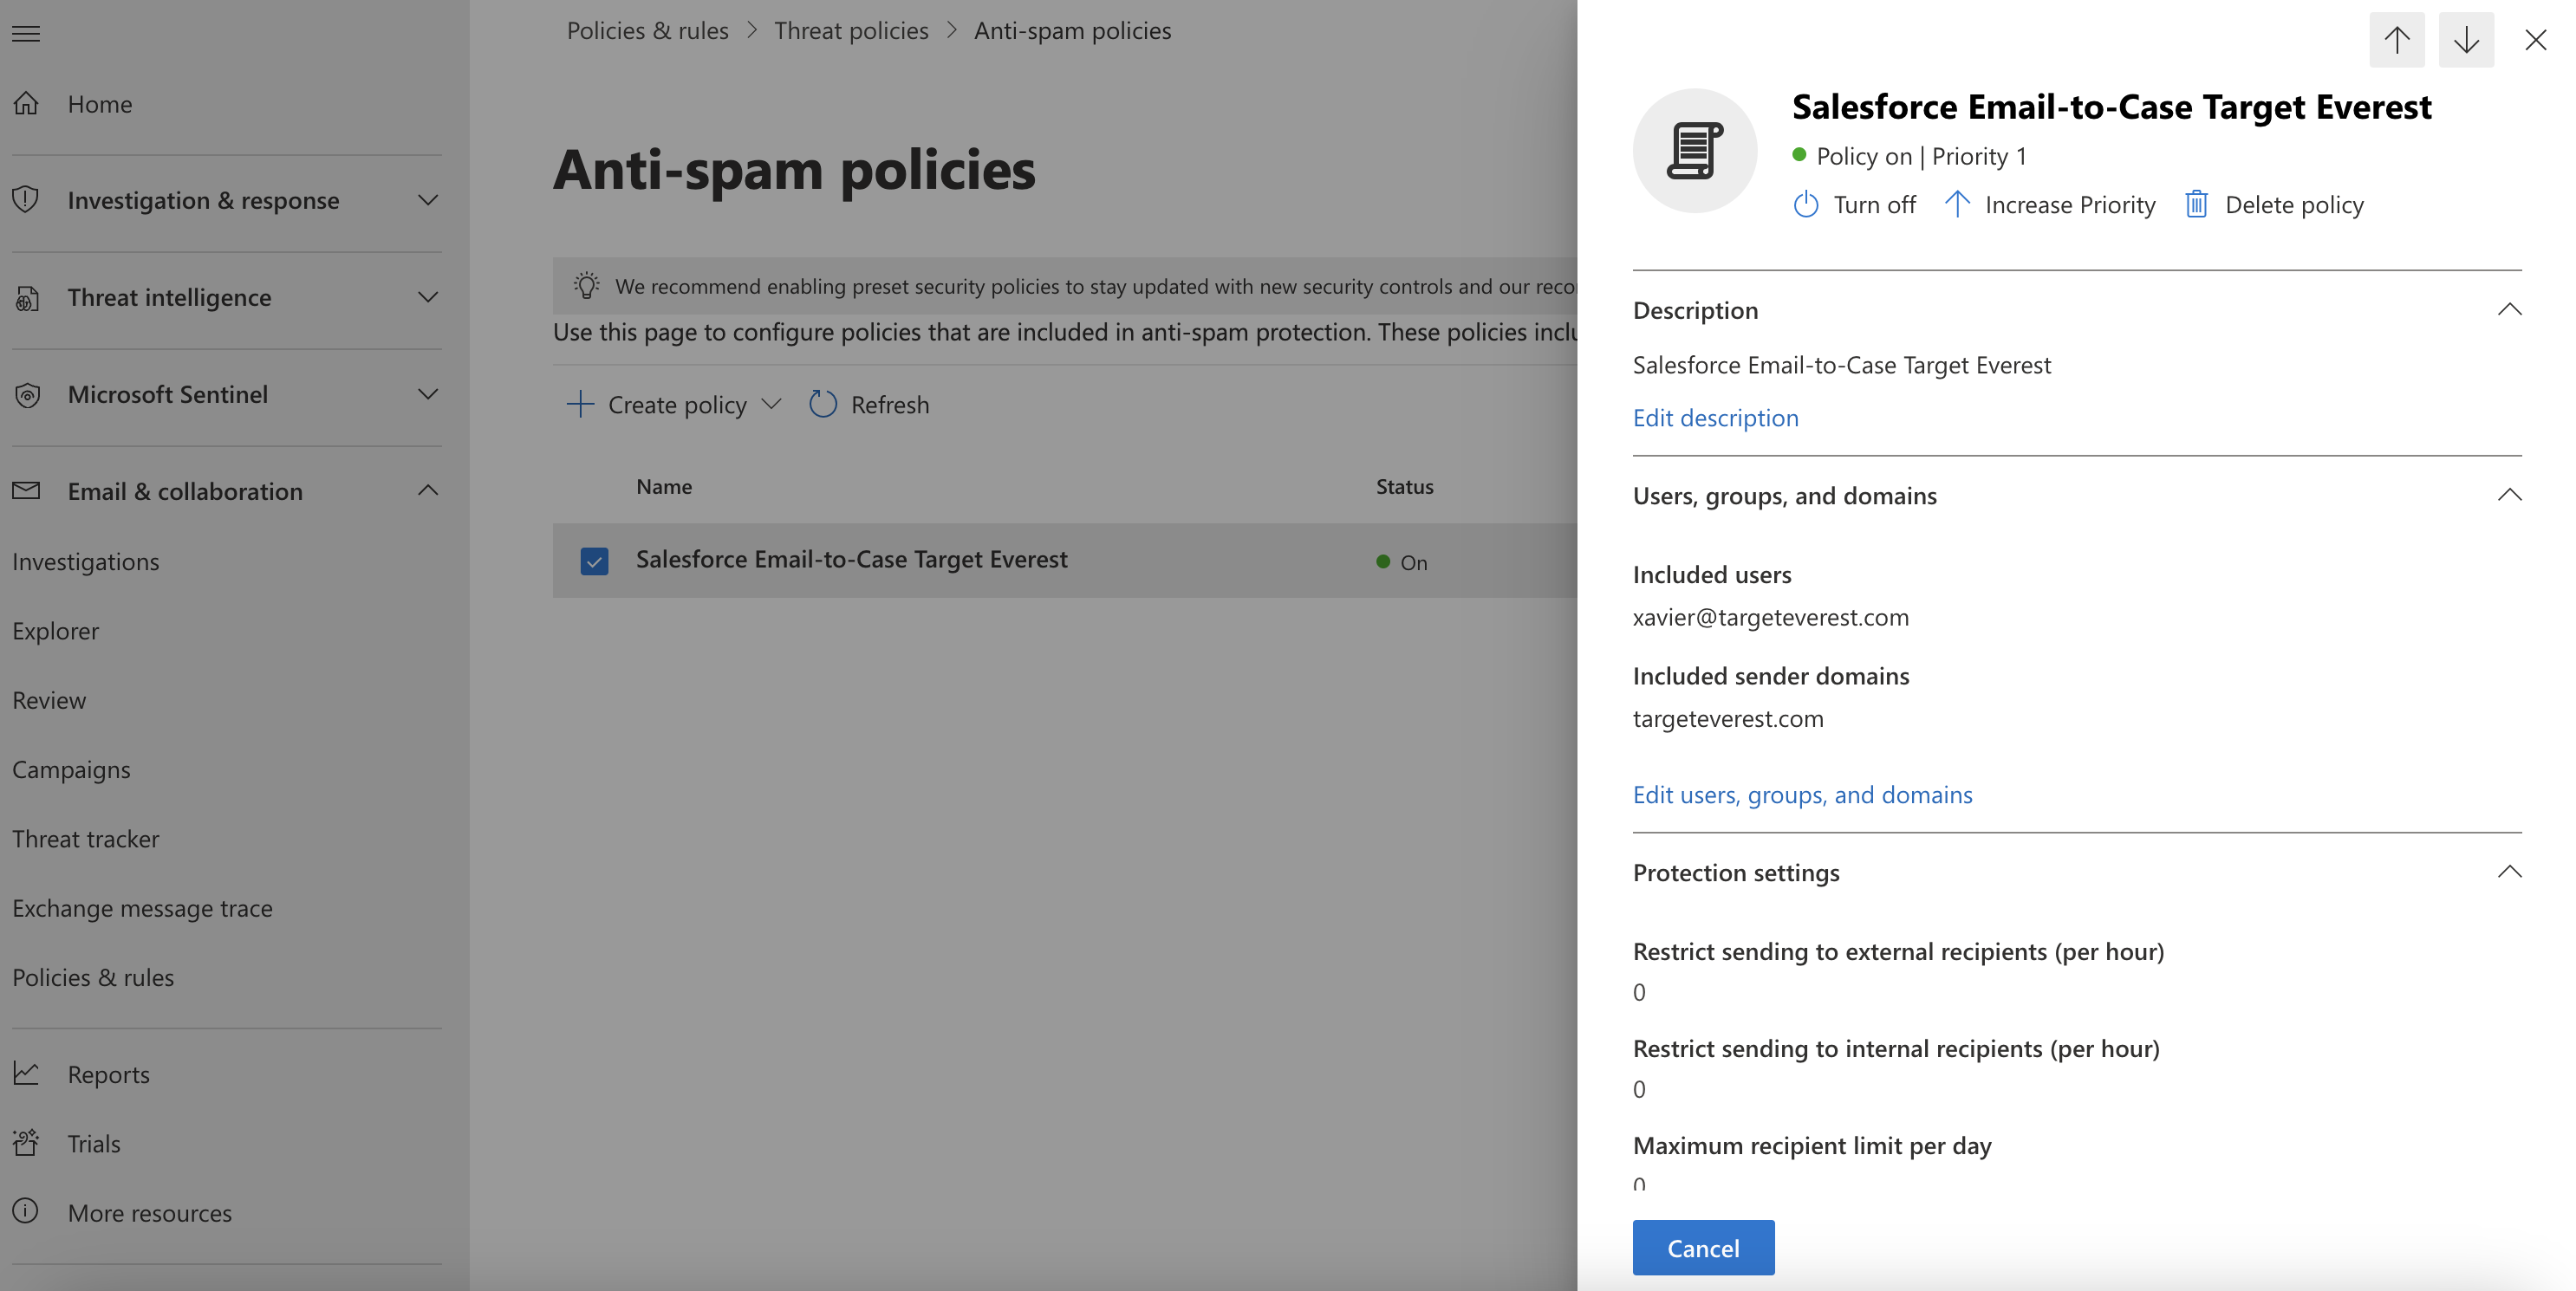
- Follow these Steps during Policy creation
And we are done here
Salesforce Organization
1. The first step is to enable Email-to-Case in Salesforce
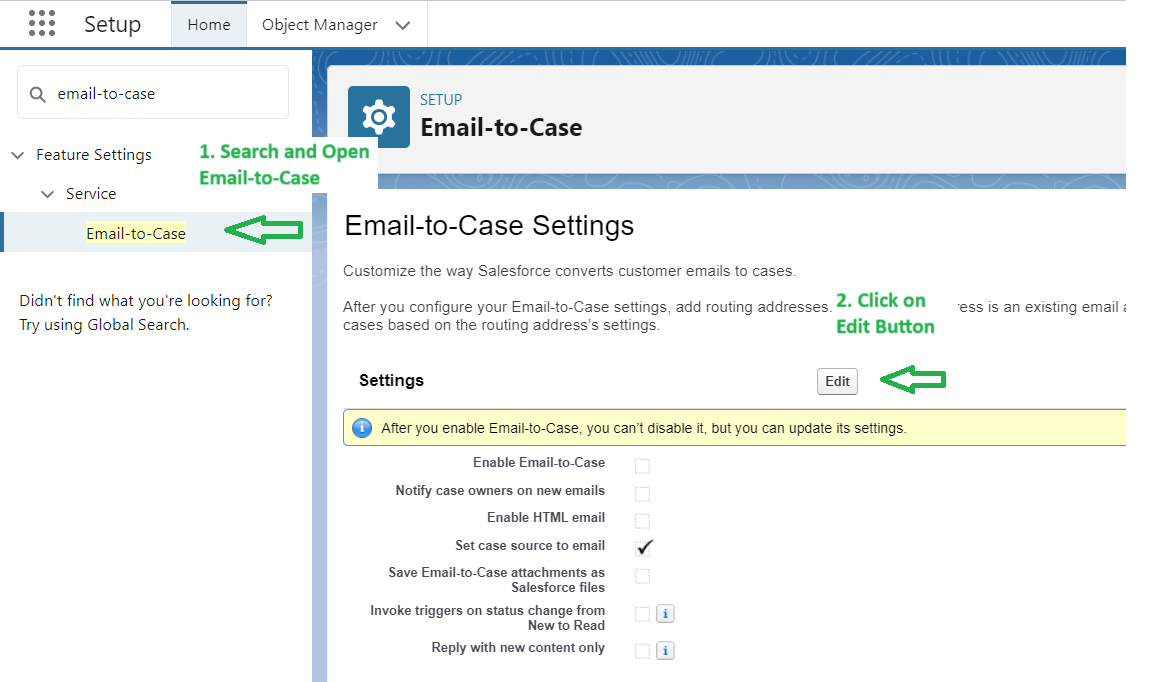
- Go to Setup
- In "Quick find", search and open "Email-to-Case" and click on the "Edit" Button
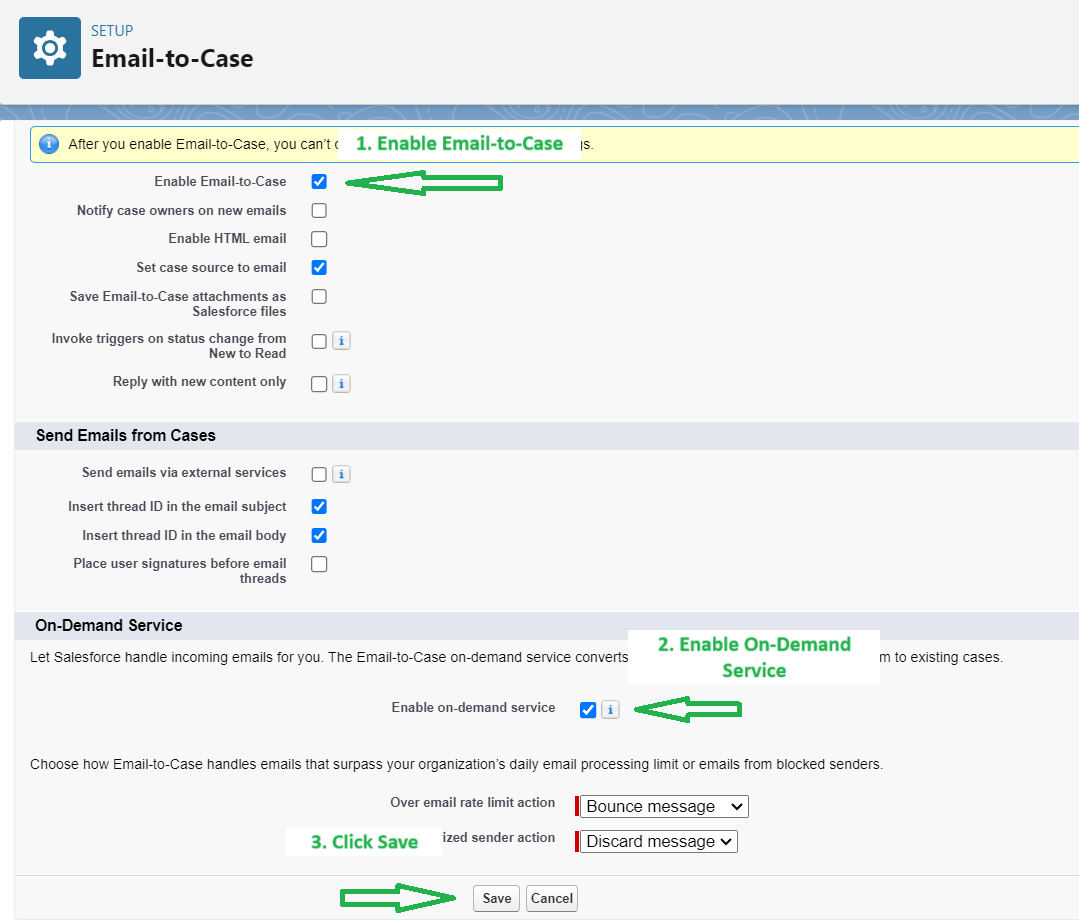
- Select "Enable Email-To-Case" and "On-Demand Service" then click on Save.
2. Next are the Routing Addresses for Email-to-Case
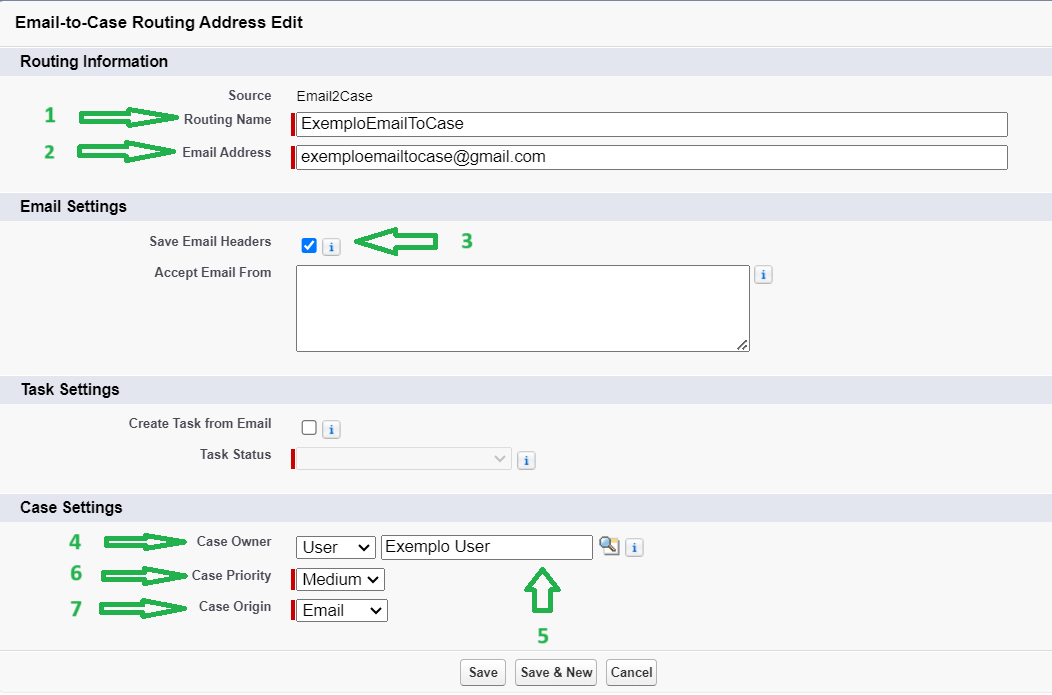
- Click on the "New" button from the Routing Addresses related list (at the bottom of the page)
- Define requirements:
- Set the Routing name for the Email-to-Case. The example used is "Exemplo Email To Case"
- Set the Email Address where the requests will be received. In this example the used email was "exemploemailtocase@gmail.com"
- Check the "Save Email Headers" Checkbox in the Email Settings
- If you are the Owner, Under Case Settings, choose Queue in the Case Owner Dropdownlist and select the corresponding Queue.
If not, just select User in the Dropdownlist and Insert the User - Define the default case priority according to your needs. In this example we defined it as Medium
- Define the case origin. In this example we defined it as Email
- Click Save
- Salesforce will automatically create an email id for you.
Copy the generated Email Services Address meanwhile.

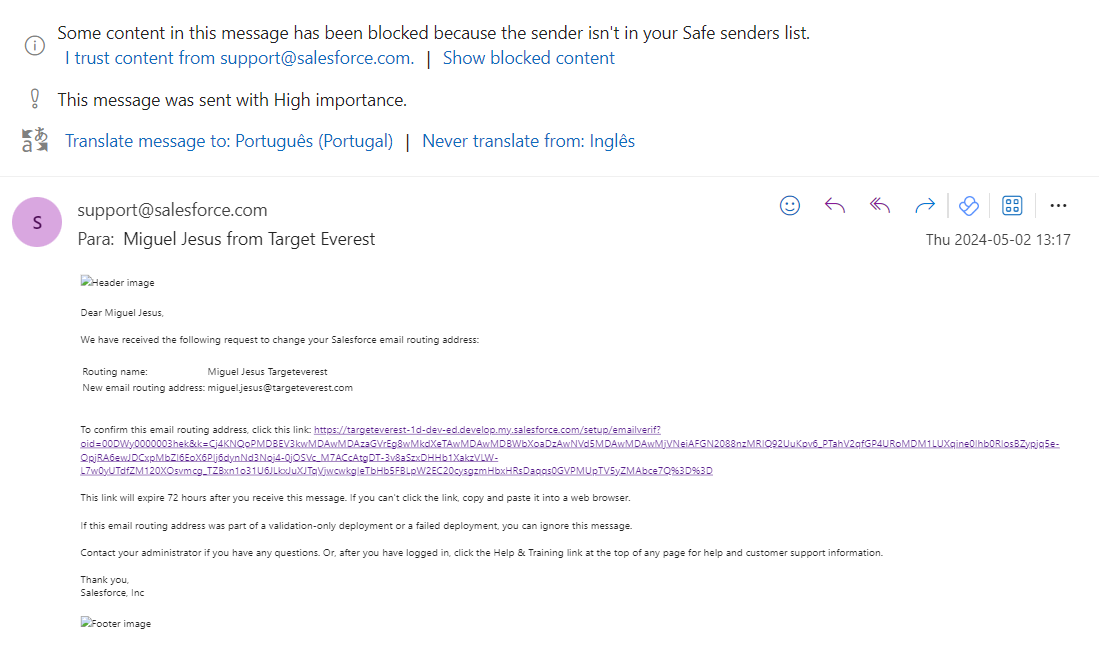
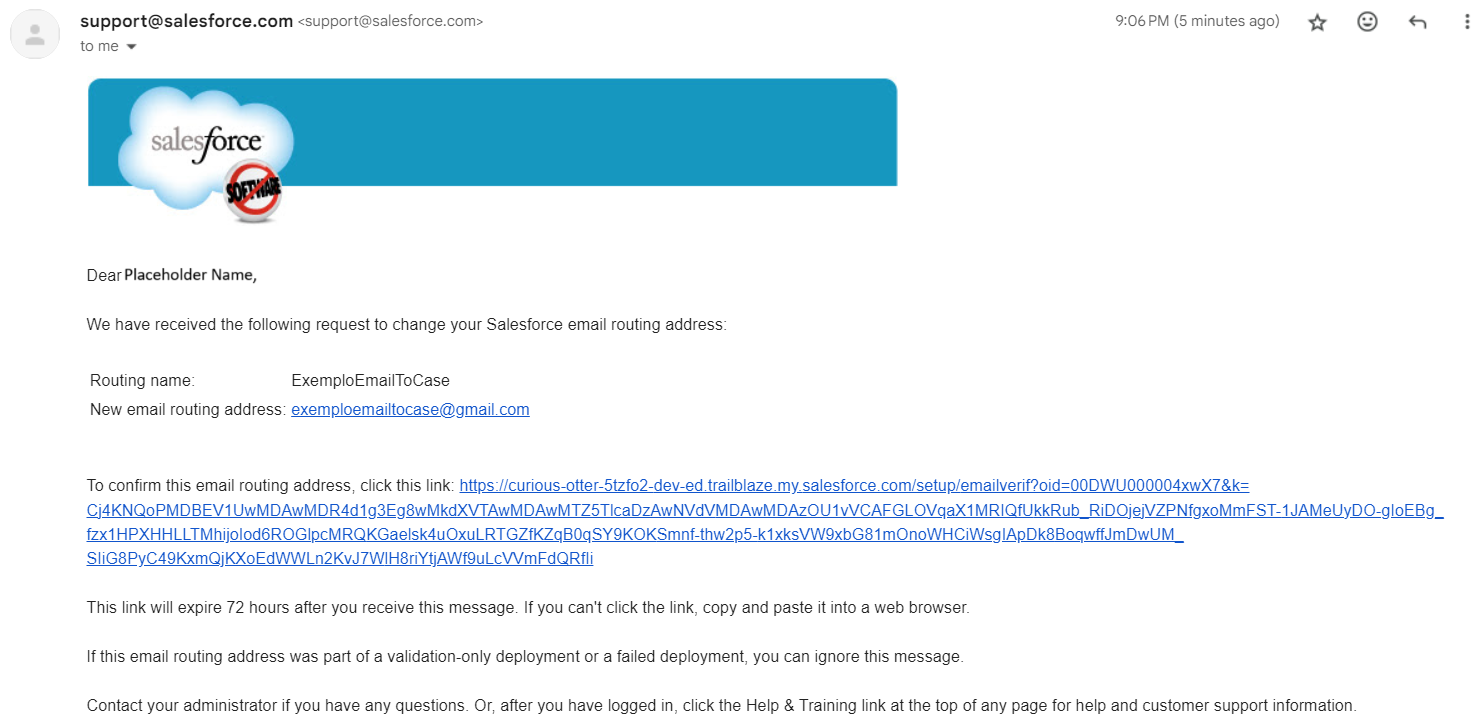
After Finishing, Salesforce will send you an email to your Email Address to verify the email ID

Gmail/Email Provider
3.1. Setting Up Routing/Forwarding Rules is the next step
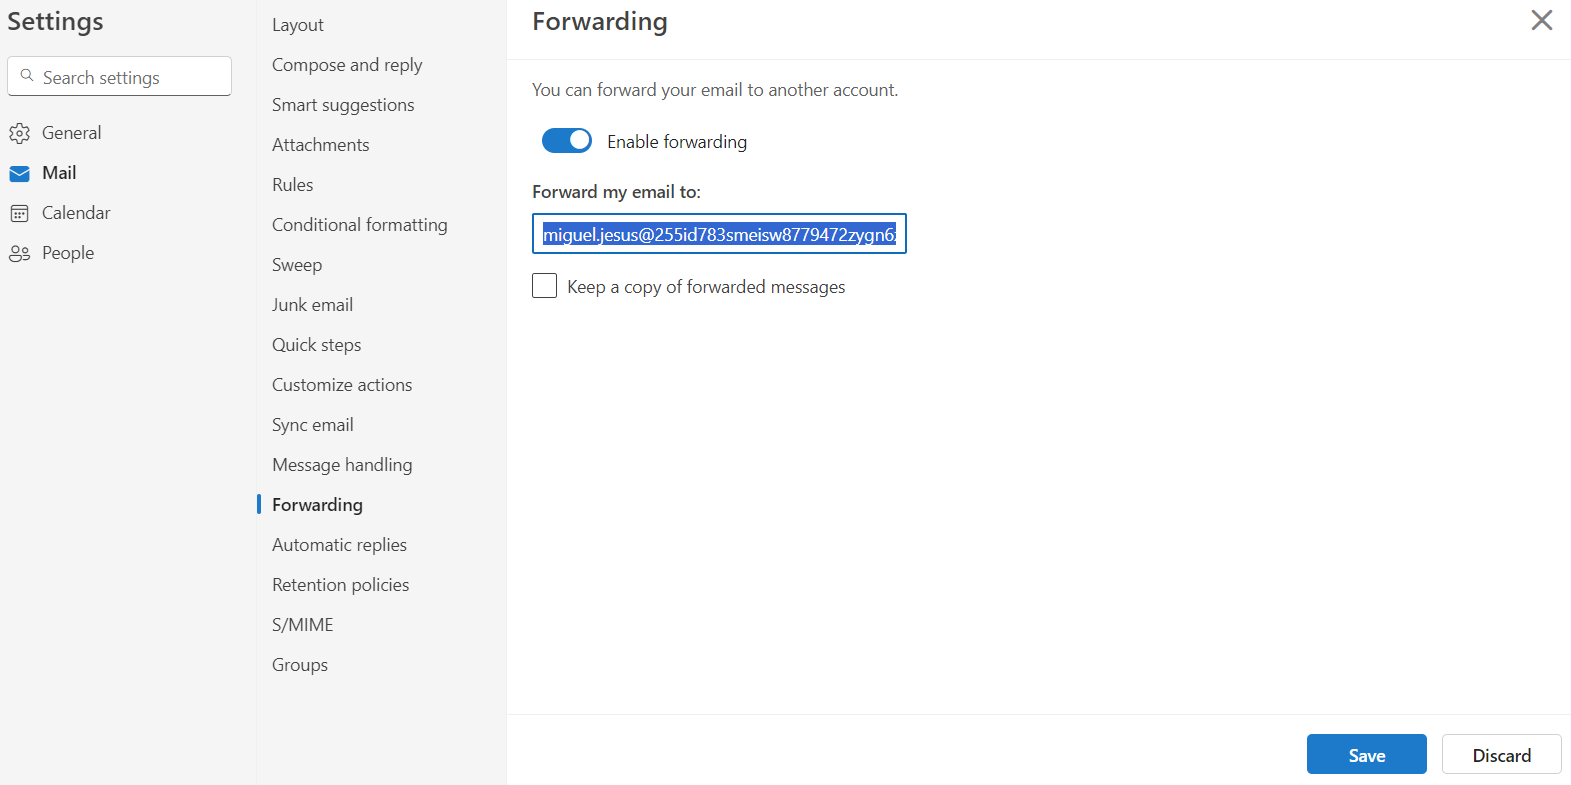
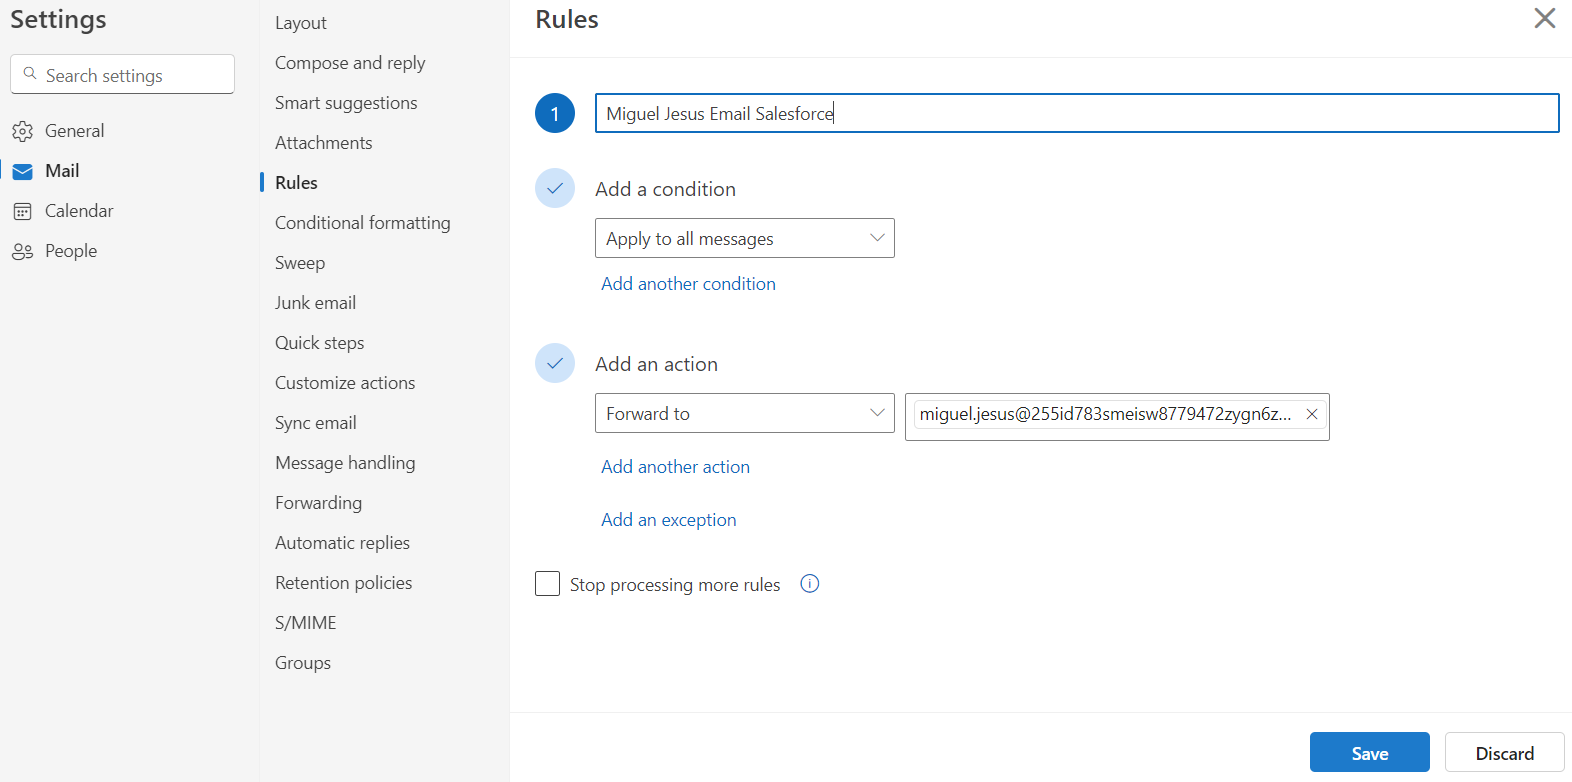
Now it is time to configure our email forwarding setting at our outlook, Gmail, or email provider.
- Configure your email system to forward messages received at exemploemailtocase@gmail.com to auto-generated service addresses.
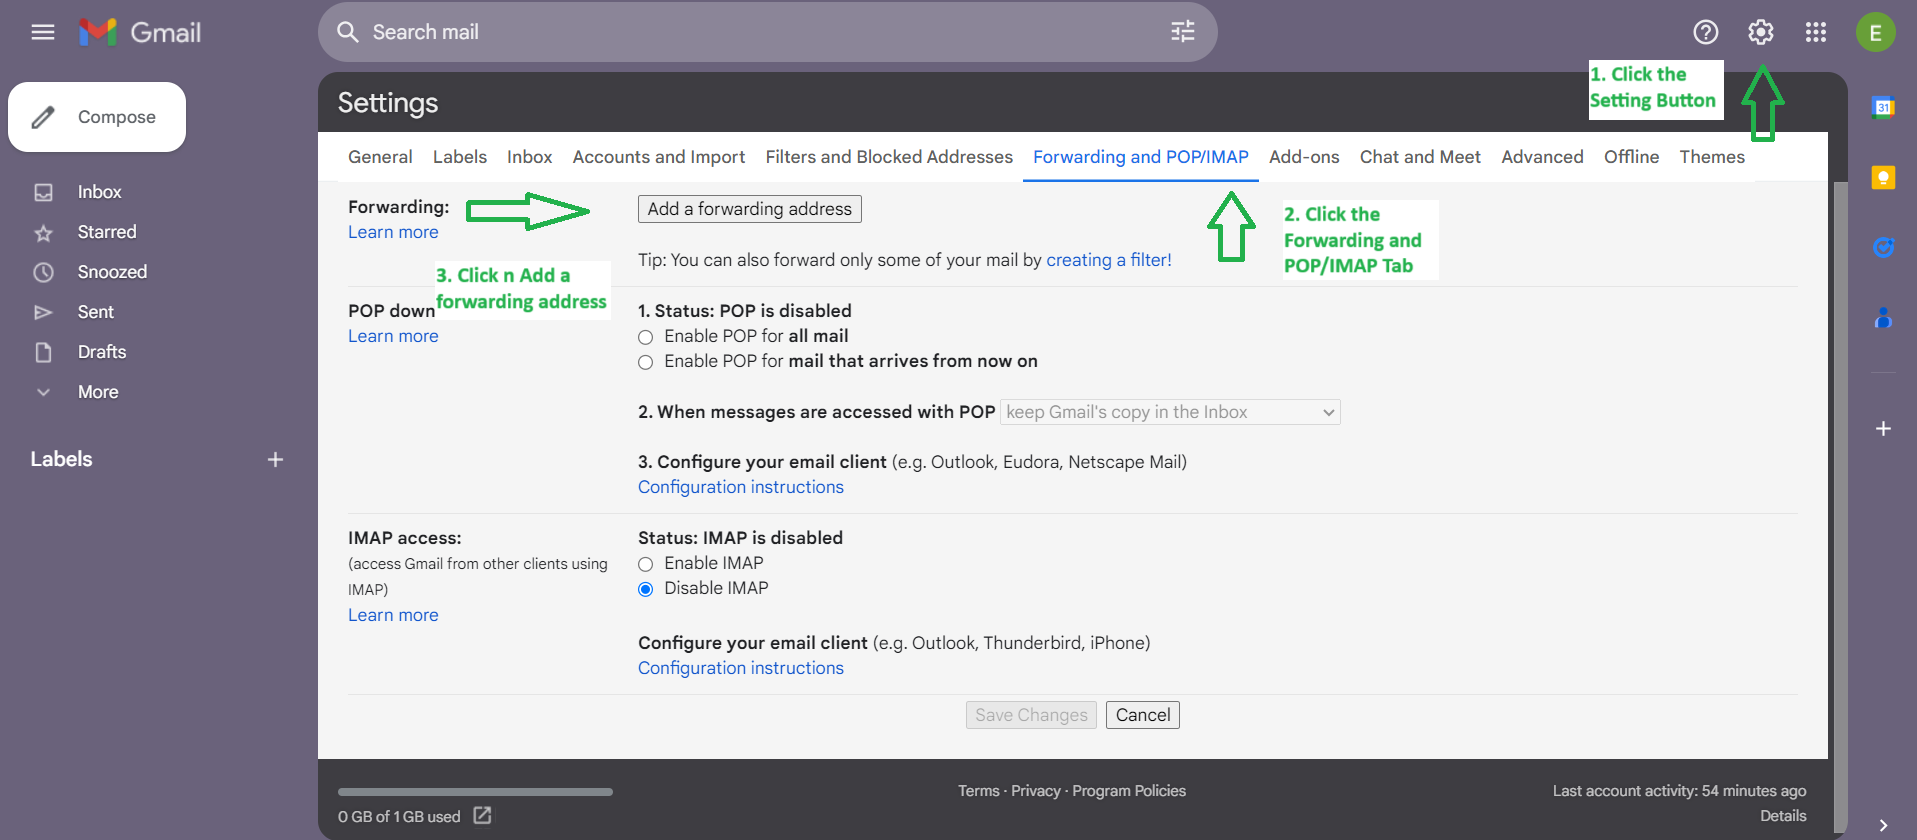
As we are using Gmail for the demo. User Gmail Article for Automatically forward Gmail messages to another account - In your Gmail, click on the settings icon, See all settings.
- Then Click on Forwarding and POP/IMAP tab.
- Then click on the “Add a forwarding address” button.
- Add forwarding address as the email provided by Salesforce.
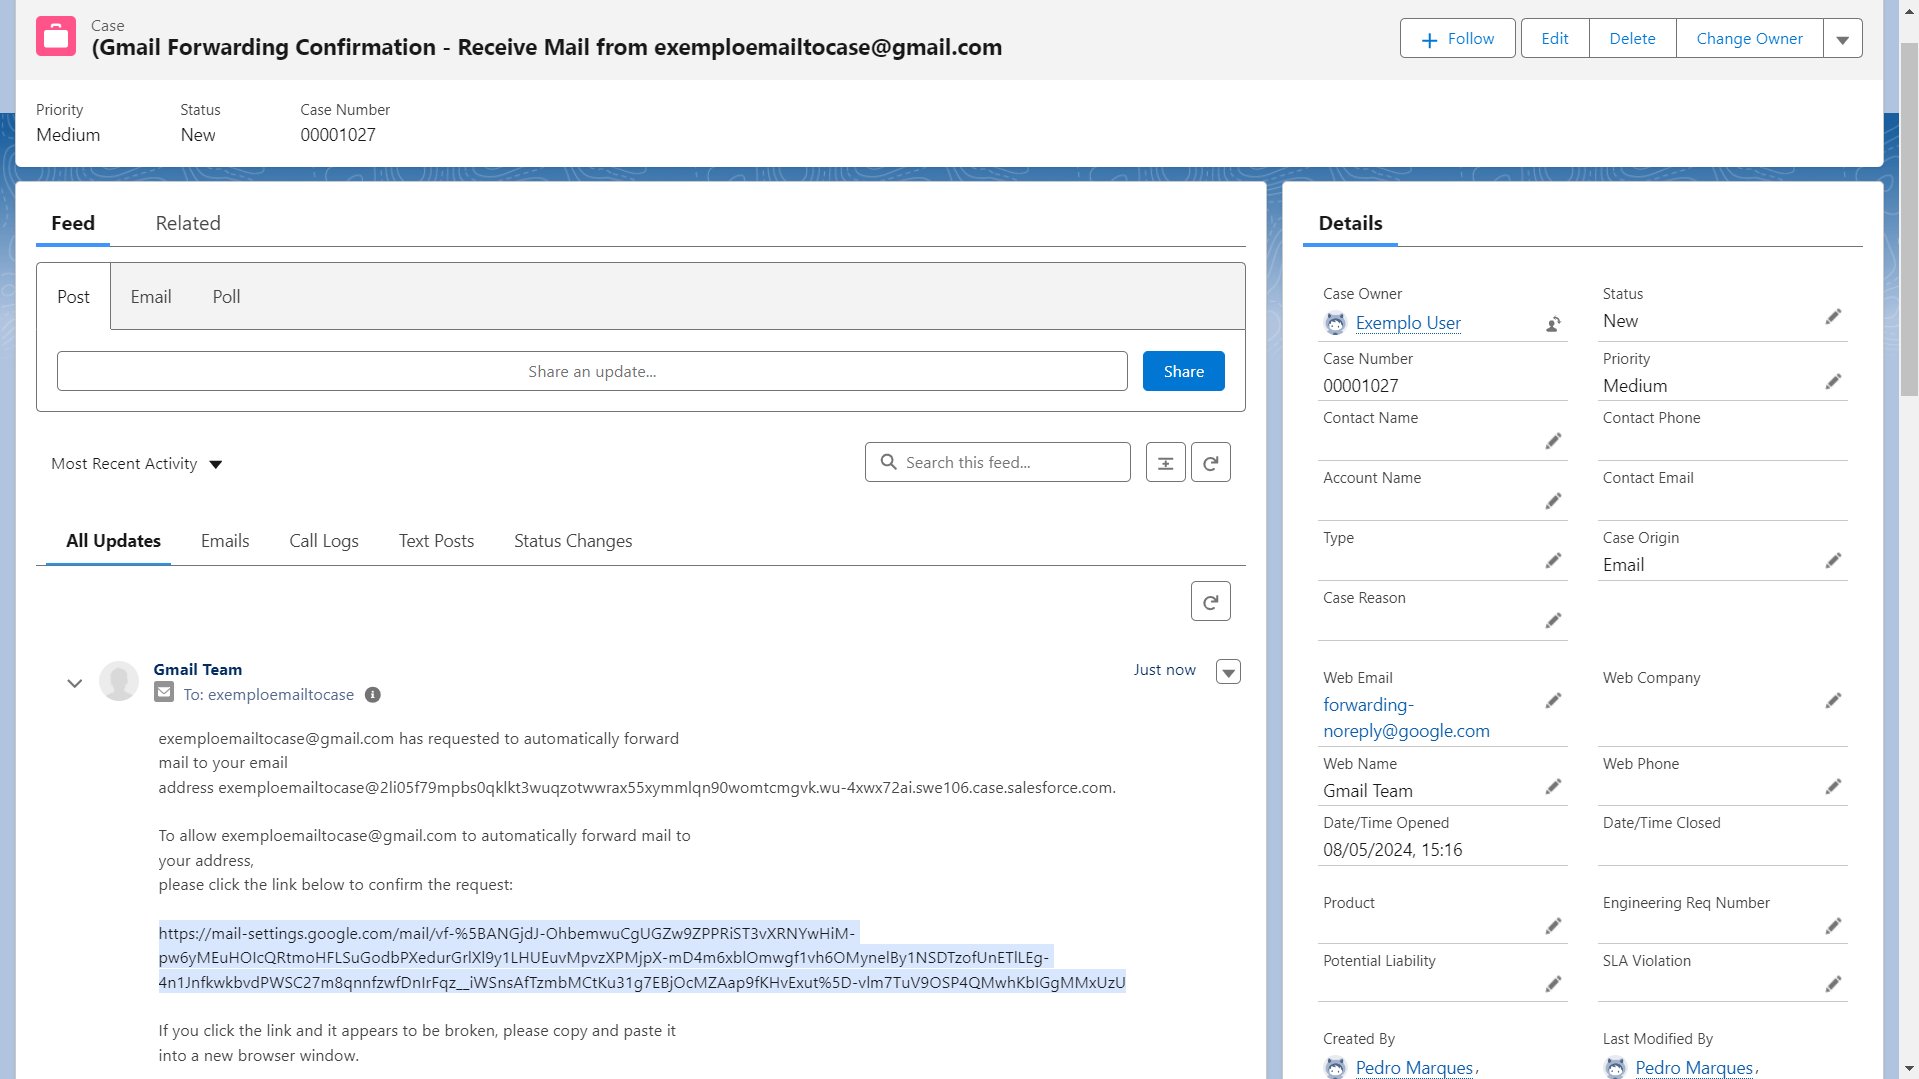
- With the email added, you will now see a Confirmation Screen saying forwarding email to auto-generated Salesforce email-to-case email ID.
- Open the Salesforce case in Services and open the link. This means our email-to-case is working!
- After opening the link, click the confirm button to ensure the forwarding is set
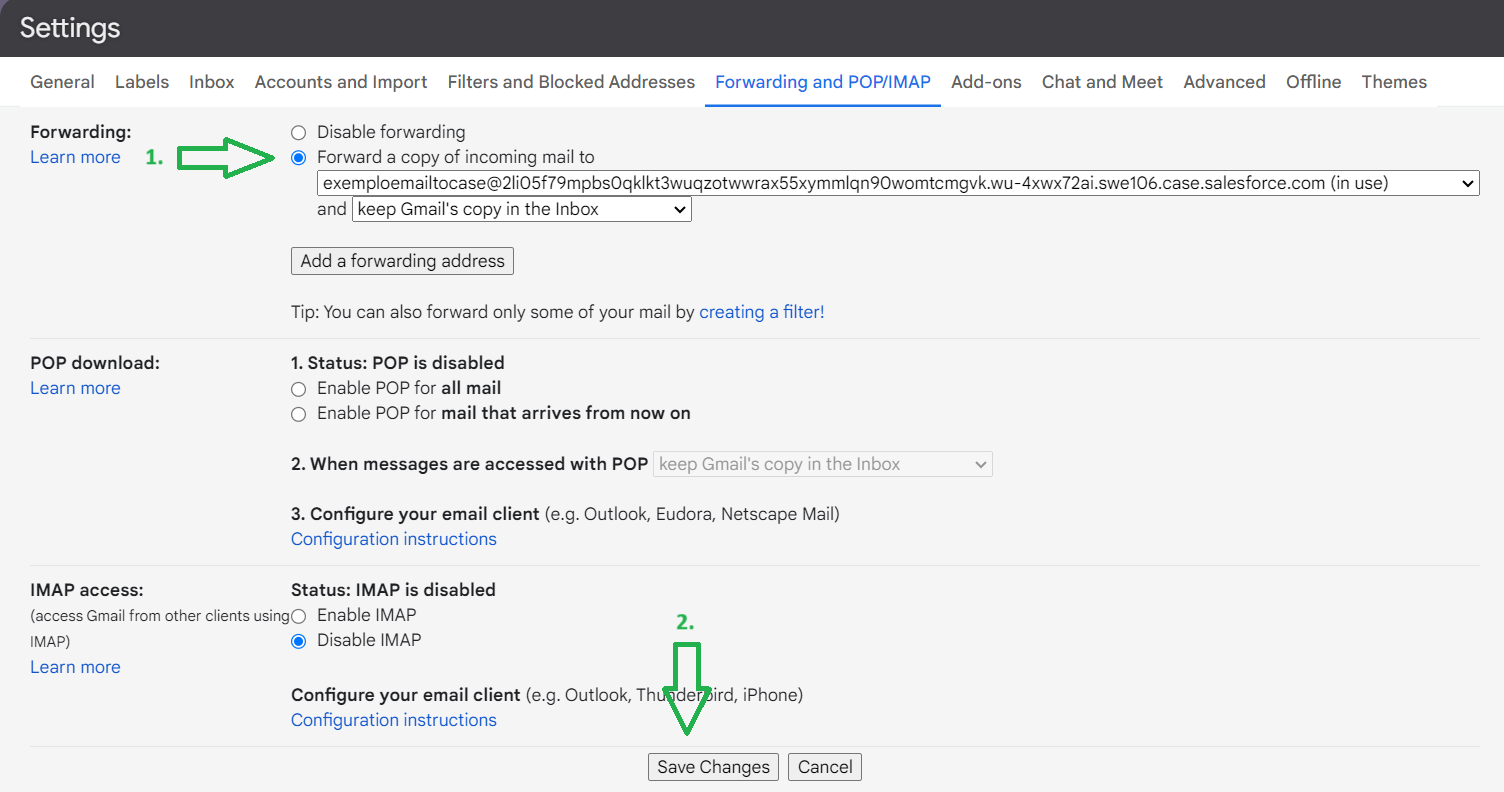
- With this done, our last step is to go to the Gmail Settings again, and turn the forwarding on for the email we just confirmed, then click Save
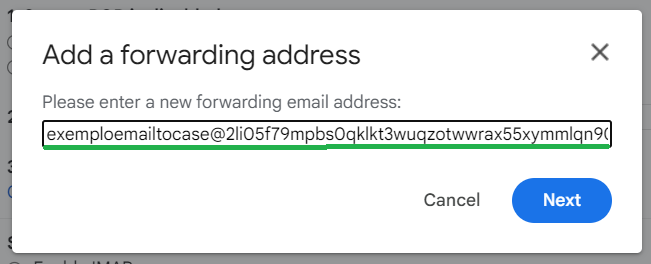

When you proceed, a new case will be created in Salesforce where you will have to open a link to confirm the forwarding email.

With this, we have concluded the Email-to-Case Setup using Gmail

